
Wisconsin Canoe generally puts 20-35 different troops on the river each year for an overnight sandbar camping excursion accommodating up to 250 scouts at a time.
Why should your troop paddle the Wisconsin River?
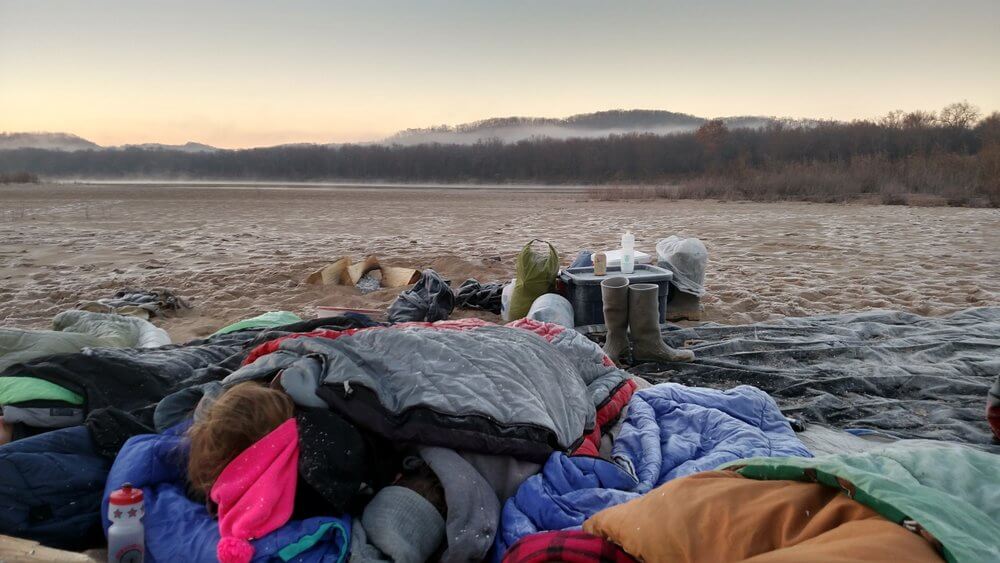
The Wisconsin River is a fantastic place for scout troops to get into the wilderness and practice their skills. This is one of the few places in the Midwest that offer a true wilderness camping experience. You’ll paddle downriver with your equipment and find your own campsite (choose from any of a hundred different sandbars); no electricity, no bathrooms, no neighbors.
Check out our canoe camping page for specific details about canoe camping on the Wisconsin River and the overnight trips we offer.
Scouts are also able to earn a number of merit badges – canoeing and kayaking chief among them. See Badge Requirements below.
Why should your troop choose Wisconsin Canoe Company?
Best Equipment
We provide composite boats and comfortable ski-style life vests. Our boats are the youngest on the river (and we can slip in a couple seatbacks for the trip leaders).
Best Shuttle System
We shuttle you upriver at the start of your trip so you can paddle back to the cars on your own time. Finish, pack up, go. We’ll do the rest.
Best Communication
Your entire reservation can be done online. We’re available via phone, email, SMS, and facebook. It’s not uncommon to get a quick response at 10pm and our emergency line is staffed 24 hours a day.
Best Group Discounts
Variable pricing means your troop can get significant discounts on midweek trips and, to a lesser extent, on the weekends.
Best Guarantee
We guarantee 130% that the boats you reserve will be ready and waiting for you. No overbooking here.
Best Safety Record
Thousands of customers and hundreds of thousands of shuttle miles – no accidents, 100% survival rate. In case of inclement weather, we’ll keep you up to date with email and SMS alerts.
The canoe trip was epic and will be remembered for a lifetime. The canoes and equipment were tip top and you guys were great. Website was very helpful and pricing was competitive. I will definitely recommend WCC to anyone. We will be back! Have a great rest of the season!
Kenley Perry – Camp Director, JCYS Camp Henry Horner
Things to keep in mind when planning your trip
Safety
Safety is always a consideration for scout groups and while no outdoor outing is without risk, the Wisconsin River does offer a few benefits to help leaders and put parents at ease. Yes, the lower Wisconsin is completely protected from development, thus the feeling of wilderness, however there are convenient access points every 6 to 8 miles along the riverway in case a quick departure is necessary. Cell phone coverage is getting more reliable along most of the river depending on your cell provider (U.S. Cellular and Verizon are best; AT&T/Sprint/T-Mobile less so but generally still adequate and text messages should go through). Most important, in case of a real emergency, both Prairie Du Sac and Spring Green (the start and end point to most trips) have search and rescue teams specifically trained and equipped for river rescue (this includes hovercraft). There is no charge for these services in an emergency, simply dial 911.
Equipment
Wisconsin Canoe provides all equipment necessary to safely canoe or kayak the river. Our equipment is never more than a few years old and very durable. Our boats (Old Town Discoveries and Necky Manitous) are a 3 layer polyethelene construction which makes them quiet, stable, and indestructible. It’s also worth mentioning that these will not become extremely hot in the sun like aluminum canoes, i.e. you won’t get burned. Canoes are 15’8″ long and 36″ wide with a weight capacity of 1,100lbs. They’ll hold more than you think but all the same, try to pack only what is necessary. All scouts are also provided with a comfortable ski-vest style life jacket they won’t mind wearing and outfitter grade paddles.
Rates
Scouts automatically qualify for our large group and overnight discounts. Depending on the size of your group and the duration of your trip, scouts will receive up to 20% off the standard day rate. These discounts are automatically applied when booking your trip through our reservation system. The larger your group, the bigger the discount. If you also choose to go overnight, you’ll see an additional price drop.
If your group has a tax exempt form, you can send us an electronic copy after making your reservation and we will fully refund all sales tax.
Trip Planning
Trip planning is covered in more depth in the Planning Center.
Merit Badges
This would be a perfect opportunity to prepare your group for canoe and/or kayaking merit badges.
- Show that you know first aid for injuries or illnesses that could occur while canoeing, including hypothermia, heat reactions, dehydration, insect stings, tick bites, and blisters.
- Do the following:
- Identify the conditions that must exist before performing CPR on a person. Explain how such conditions are recognized.
- Demonstrate the proper technique for performing CPR using a training device approved by your counselor.
- Before doing the following requirements, successfully complete the BSA swimmer test: Jump feetfirst into water over the head in depth. Level off and swim 75 yards in a strong manner using one or more of the following strokes: sidestroke, breaststroke, trudgen, or crawl; then swim 25 yards using an easy, resting backstroke. The 100 yards must be completed in one swim without stops and must include at least one sharp turn. After completing the swim, rest by floating.
- Discuss the following:
- The BSA Safety Afloat policy. Tell how it applies to canoeing activities.
- The most common weather and water-related hazards encountered while canoeing and how to deal safely with each one.
- Do the following:
- Name and point out the major parts of a canoe.
- Describe how the length and shape of a canoe affect its performance.
- Discuss the advantages and disadvantages of the different materials used to make canoes.
- Name and point out the parts of a paddle. Explain the difference between a straight and bent-shaft paddle and when each is best used.
- Demonstrate how to size correctly a paddle for a paddler in a sitting position and a kneeling position.
- Name the different types of personal flotation devices (PFDs), and explain when each type should be used.
- Show how to fit and test properly a PFD of correct size.
- Discuss the general care and maintenance of canoeing equipment.
- Discuss what personal and group equipment would be appropriate for a canoe camping trip. Describe how personal and group equipment can be packed and protected from water.
- Demonstrate how to load and secure equipment in a canoe.
- Using appropriate knots, demonstrate how to secure a canoe to a rack on land, a vehicle, or a canoe trailer.
- With a companion, wearing the proper PFD and appropriately dressed for the weather and water conditions, use a properly equipped canoe to demonstrate the following:
- Safely carry and launch the canoe from a dock or shore (both, if possible).
- Safely land the canoe on a dock or shore (both, if possible) and return it to its proper storage location.
- Demonstrate kneeling and sitting positions in a canoe and explain the proper use for each position.
- Change places while afloat in the canoe.
- In deep water, exit the canoe and get back in without capsizing.
- Capsize the canoe and demonstrate how staying with a capsized canoe will support both paddlers.
- Swim, tow, or push a swamped canoe 50 feet to shallow water. In the shallow water, empty the swamped canoe and reenter it.
- In deep water, rescue a swamped canoe and its paddlers by emptying the swamped canoe and helping the paddlers safely reenter their boat without capsizing.
- With a companion, wearing the proper PFD and appropriately dressed for the weather and water conditions, demonstrate the following paddling strokes as both a bow and stern paddler:
- Forward stroke
- Backstroke
- Draw
- Pushaway
- Forward sweep
- Reverse or back sweep
For stern paddling only: - J-stroke
- Using the strokes in requirement 7, demonstrate the following tandem maneuvers while paddling on opposite sides and without changing sides. Repeat after switching positions and paddling sides:
- Pivot or spin the canoe in either direction.
- Move the canoe sideways or abeam in either direction.
- Stop the canoe.
- Move the canoe in a straight line for 50 yards.
- Wearing the proper PFD and appropriately dressed for the weather and water conditions, demonstrate solo canoe handling:
- Launch from shore or a pier (both, if possible).
- Using a single-blade paddle and paddling only on one side, demonstrate proper form and use of the forward stroke, backstroke, draw stroke, pushaway stroke, forward sweep, reverse or back sweep, and J-stroke. Repeat while paddling on the other side.
- While paddling on one side only, paddle a 50-yard course making at least one turn underway and one reverse of direction. Repeat while paddling on the other side.
- Make a proper landing at a dock or shore (both, if possible). Store canoe properly (with assistance, if needed).
- In deep water, exit the canoe and then get back in without capsizing.
- Discuss the following types of canoeing:
- Olympic flatwater
- Outrigger
- Marathon
- Freestyle
- Whitewater
- Canoe poling
[/ms_accordion_item] [ms_accordion_item title=’Kayaking Badge Requirements’ icon=” status=’close’]
- Do the following:
- Explain to your counselor the hazards you are most likely to encounter while participating in kayaking activities, including weather and water-related hazards, and what you should do to anticipate, help prevent, mitigate, and respond to these hazards.
- Review prevention, symptoms, and first-aid treatment for the following injuries or illnesses that can occur while kayaking: blisters, cold-water shock and hypothermia, heat-related illnesses, dehydration, sunburn, sprains, and strains.
- Review the BSA Safety Afloat policy. Explain to your counselor how this applies to kayaking.
- Before doing requirements 3 through 9, successfully complete the BSA swimmer test: Jump feetfirst into water over the head in depth. Level off and swim 75 yards in a strong manner using one or more of the following strokes: sidestroke, breaststroke, trudgen, or crawl; then swim 25 yards using an easy, resting backstroke. The 100 yards must be completed in one swim without stops and must include at least one sharp turn. After completing the swim, rest by floating.
- Do the following:
- Review the characteristics of life jackets most appropriate for kayaking and understand why one must always be worn while paddling. Then demonstrate how to select and fit a life jacket for kayaking.
- Review the importance of safety equipment such as a signal device, extra paddle, sponge, bilge pump, and throw bag.
- Do the following:
- Name and point out the major parts of a kayak.
- Review the differences in the design between recreational, whitewater, and sea or touring kayaks. Include how length, width, stability, and rocker are involved in the design of each type.
- Review the advantages and disadvantages of the materials most commonly used to make kayaks. Explain the care, maintenance, and storage of a kayak.
- Using the trucker’s hitch and bowline, demonstrate how to secure a kayak to a rack on a vehicle or a trailer, or to a rack on land.
- Discuss the following:
- How to choose a kayak paddle.
- The different materials from which paddles are made, parts of a paddle, and the care and maintenance of a paddle.
- Using a properly equipped kayak with an open cockpit, a sit-on-top, or an inflatable kayak, do the following:
- Safely capsize and perform a wet exit.
- Reenter the kayak with assistance from a buddy boat.
- Demonstrate a kayak-over-kayak rescue.
- Demonstrate the HELP position.
- Capsize the kayak, swim it and the paddle to shore, and empty water from the kayak with assistance, if needed.
- As a solo paddler, use a properly equipped kayak to demonstrate the following:
- Forward stroke
- Backstroke
- Forward sweep
- Reverse sweep
- Draw stroke
- Stern draw
- As a solo paddler, use a properly equipped kayak to demonstrate the following:
- Paddle a straight line for 25 yards, make a sharp turn, and return 25 yards in a straight line.
- Spin or pivot 360 degrees to the right and 360 degrees to the left.
- Move abeam to the right 10 feet and to the left 10 feet.
- Stop the boat in one boat length.
- Paddle a buoyed course of a length determined by your counselor that includes two right turns and two left turns performed while under way.